
Services
Facade repairs, joint sealing and painting by rope access
Facade repair is a targeted intervention into a damaged spot on a building's outer skin, that is making good a crack, fallen render, a leaking joint or a water-damaged area, followed by painting so the repair blends into its surroundings. We work by rope access, so we reach five metres of cracking on the tenth floor without scaffolding having to stand around the whole building.
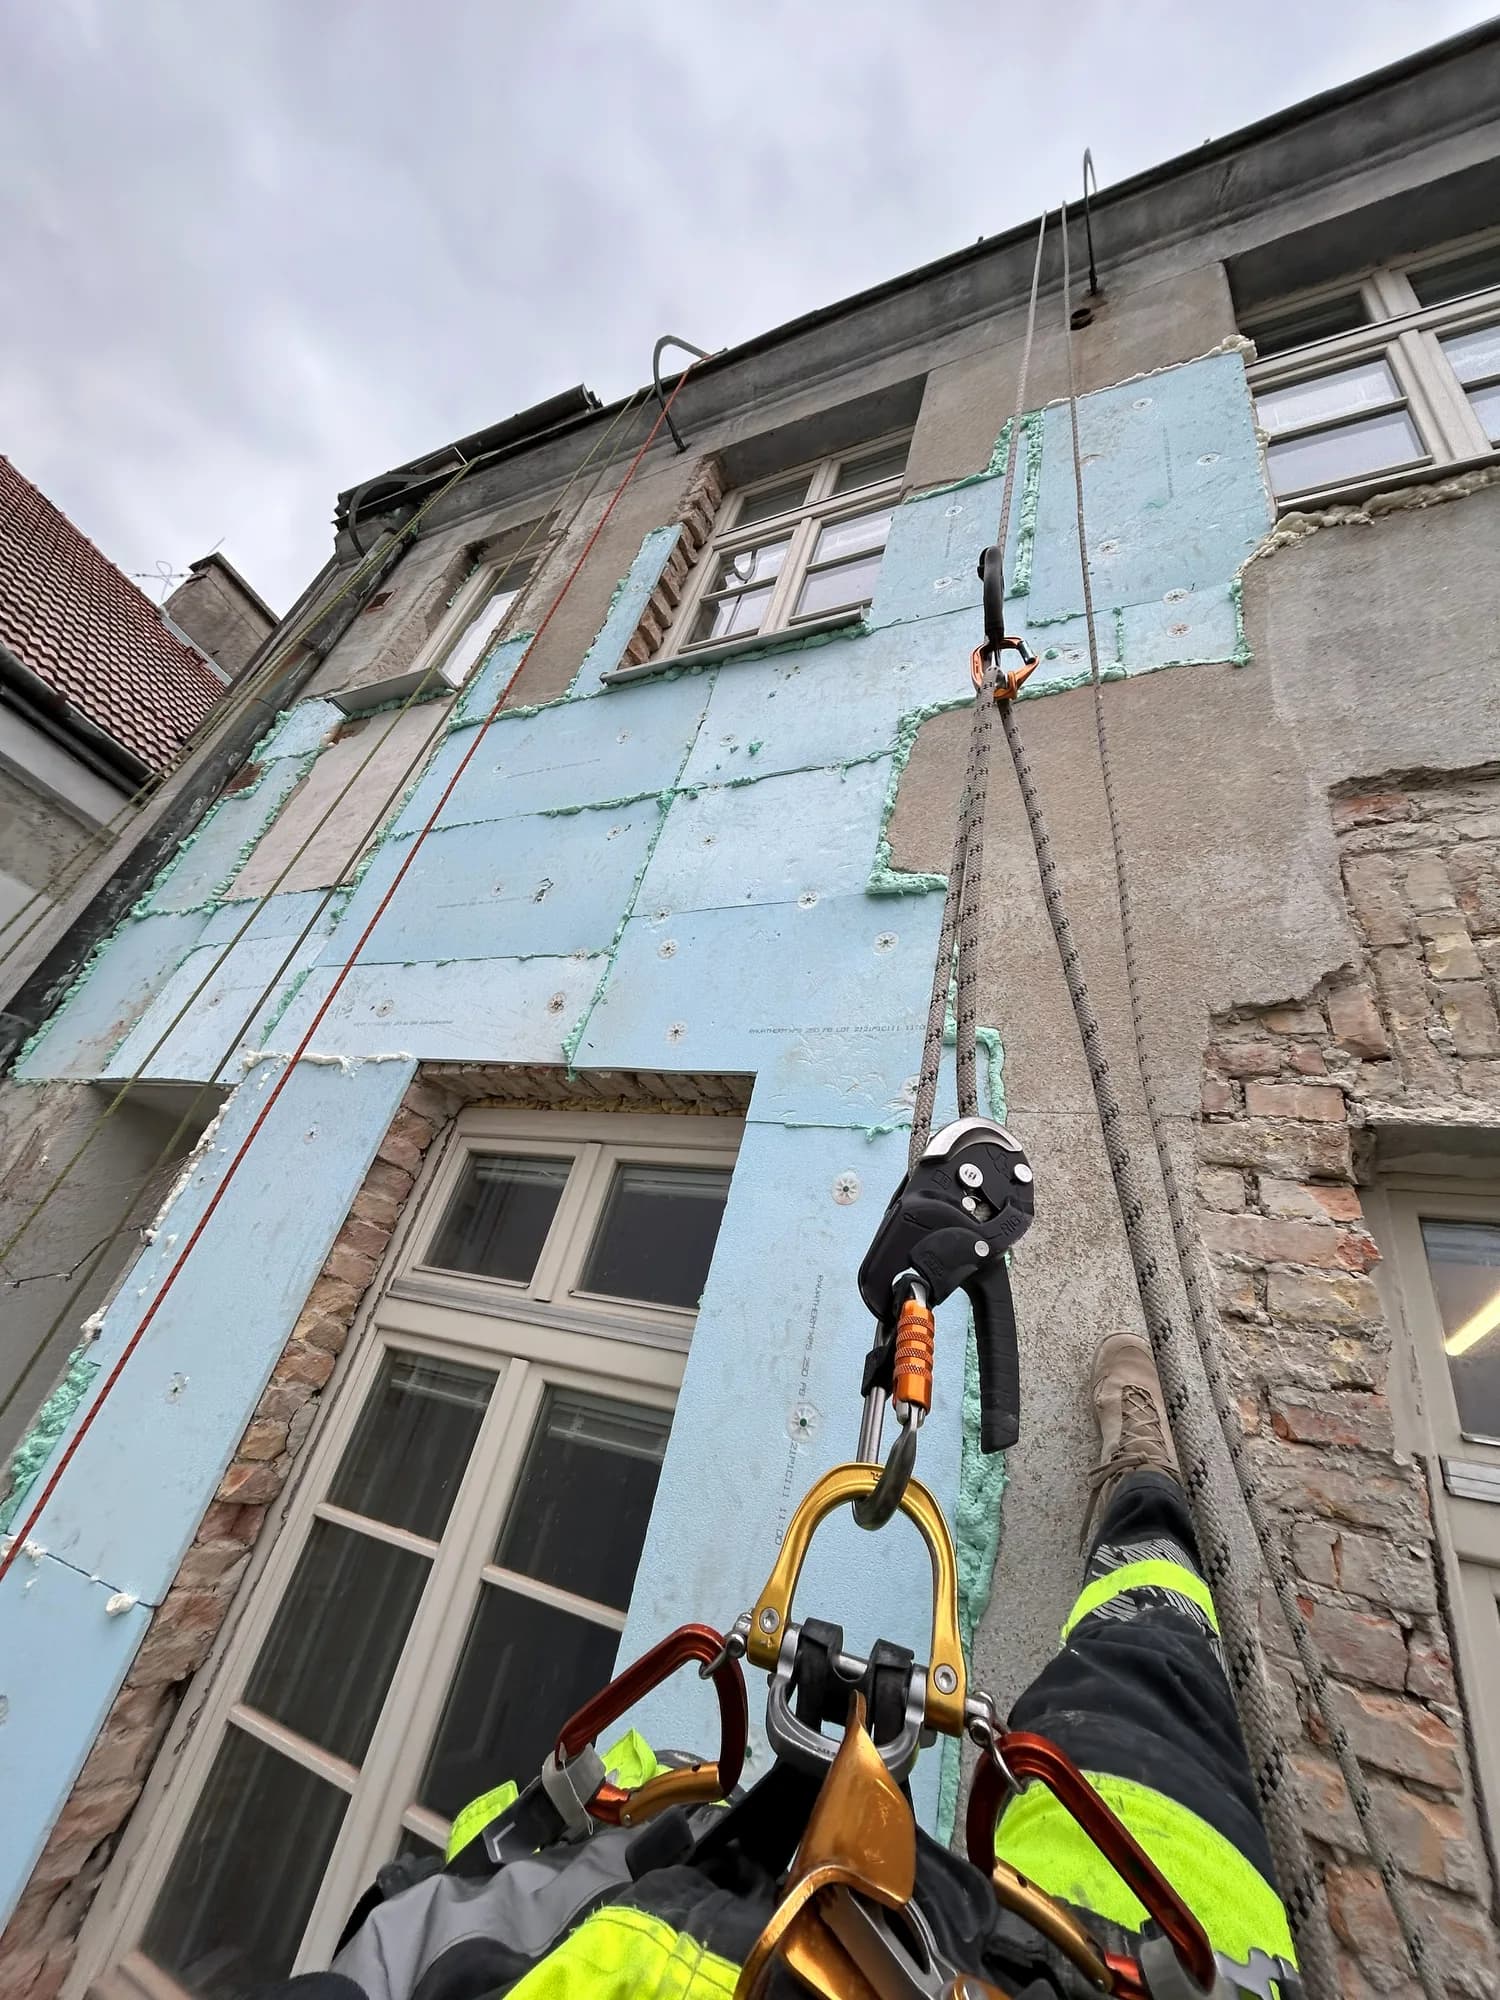
A facade does not deteriorate evenly. It fails first where water runs over it, where the structure moves and where a detail was rushed, that is around windows and sills, on the parapet, in the joints between panels and at the corners. The rest of the surface is often sound for years, and that is exactly why spot repairs pay off.
The problem is access. As long as the damaged spot can be reached from a ladder, any bricklayer will fix it. Once it sits on the fourth floor, suddenly you need scaffolding around the whole building or a platform with a pavement closure, and the cost of repairing three metres of crack climbs to a multiple of the work itself. Rope access removes that part.
We carry out local repairs and full facade renovation, sealing and repointing of joints, facade remediation after water ingress and after fire, and painting work at height. We hold liability insurance and have experience from both Slovakia and Switzerland; our work includes a local facade repair at Hotel Carlton and painting at height on Vajnorská for Tulipa s. r. o.
What's included
- Local facade repair without scaffolding, straight from rope access
- Repairs to insulated facades and to plain render without insulation
- Sealing and repointing of joints on panel blocks
- Painting at height, including substrate preparation and priming
- We look for the cause of the leak, not just cover the water stain
- Matching both the colour and the render texture to the area around the repair
Why a crack in a facade is not a cosmetic matter
A crack is a route for water. Wind-driven rain gets into it, soaks into the layer under the render and stays there, because it evaporates outwards more slowly than it gets in. On an insulated facade this means wet insulation, and wet insulation stops insulating, because water conducts heat far better than the air trapped inside the insulant.
The second factor is frost. Water in the crack freezes, expands and prises it open a little further. Every winter lengthens and widens it, so a hairline crack that one person could seal in an hour today becomes fallen render and a damp patch in a flat three winters later.
What you see is usually smaller than the real damage. While only a thin crack is visible on the surface, the debonded area underneath is often far larger. That is why we always tap out the area around a crack during the survey.
Repairing an insulated facade versus render without insulation
An insulated facade, that is an ETICS build-up, is a layered system: adhesive, insulation, anchors, a reinforcing base coat with glass-fibre mesh and finally a thin render only millimetres thick. Render without insulation, by contrast, sits directly on masonry or concrete, so it is a thicker and mechanically tougher layer on a solid substrate.
Everything else follows from that. An insulated facade is the more delicate of the two, because beneath the thin surface layer sits soft insulation that tolerates no moisture and holds no fixing reliably. Plain render forgives more, but once it starts to flake off there is usually damp masonry or salts behind it, and that is a different repair altogether.
| What we compare | Insulated facade (ETICS) | Facade without insulation |
|---|---|---|
| Thickness of the surface layer | Base coat and render together only millimetres, with soft insulation beneath. | Render centimetres thick on solid masonry or concrete. |
| What a crack does | Water reaches the insulation, which gets wet and loses part of its effect. Drying out takes a long time. | Water goes into the render and masonry; damage advances more slowly but shows as damp indoors. |
| Most common cause of failure | Missing or non-overlapping reinforcing mesh, window corners, anchors, the sill detail. | Render shrinkage, settlement, damp masonry, an old non-breathable coating. |
| Typical repair | Removing the damaged layer, adding mesh with an overlap, re-coating, priming, textured render, painting. | Hacking off hollow render, consolidating the substrate, new render in the same texture, painting. |
| What to watch for | You cannot anchor into the insulation, dark shades overheat the system, and the coating must stay vapour-permeable. | Do not seal damp in under a non-breathable coating, or the repair peels off with the paint within a year. |
What a crack tells you
Cracks are not all alike, and their shape and position give away what is happening. We make this distinction during the survey, because the repair method depends on it, and so does whether facade repair is even the right answer.
- Fine hairline cracking across the whole surface, usually shrinkage of the surface layer or an old coating that has hardened and lost its flexibility.
- Cracking that traces the outline of the insulation boards into rectangles: mesh in the board joints is missing or does not overlap.
- A diagonal crack running out of a window or door corner means stress concentrated at the opening corner, where diagonal reinforcement was omitted.
- A horizontal crack at floor level or at the junction of two panels points to structural movement and to a joint that must not be rigidly filled.
- A crack with a run mark and a dark halo is a route water already takes, and the repair cannot wait for another season.
Cracks that pass through the load-bearing structure and measurably widen over time are not a job for a facade contractor. That is when a structural engineer should be consulted. We can tell you when it looks structural, but we do not produce structural assessments.
Hollow and fallen render, and what is going on beneath it
Hollow render is an area where the surface layer has separated from the substrate and is held only at the edges. From outside there may be nothing to see at all, the paint is unbroken and the wall looks sound. Tapping reveals it: a well-bonded area sounds hard and dry, a debonded one sounds hollow.
Behind a debonded area there is air and usually moisture too. If such a spot is merely sealed around its edge, the problem is closed in and a year later it falls off together with the filler. So we remove the hollow area right back to sound substrate, even when the resulting patch is larger than it looked from the pavement.
Render falling above a pavement or an entrance is a safety matter, not an aesthetic one. If pieces are already coming down, contact us as you would for an emergency: we bring loose material down in a controlled way and make the area safe, even if the repair itself happens later.
Sealing and repointing joints on a panel block
A panel block is assembled from precast units with joints between them that have to move. The difference between a winter night and a summer noon on a south wall is large enough for the units to expand and contract measurably, and the joint absorbs that movement. The original sealants coped while they stayed flexible. After years in the sun they harden, tear away from the edge of the unit and leave a hairline gap along the whole joint.
That is why the joint, not the wall, is so often the source of a leak. Wind-driven water enters the gap, runs down inside the joint and shows up indoors somewhere else, frequently a floor lower and several metres to one side. The flat owner then hunts for the cause on the ceiling, while it sits outside at the junction of two panels.
Repointing means cutting out the old sealant completely, cleaning and drying the joint, inserting a backer rod that sets the correct sealant depth and stops the sealant bonding to the back of the joint, and only then applying and tooling a flexible sealant.
Sealant bonded to three sides of a joint tears at the first significant movement. This is the most common mistake in do-it-yourself sealing and the reason a backer rod is not an optional extra.
Local facade repair or full facade renovation
A local repair pays off when the damage is concentrated and the rest of the surface is sound. Full facade renovation makes sense when there are many defects, when they are scattered across the whole elevation, or when the coating is so weathered that a local repair would look like a patch anyway.
| Situation | Sensible approach | Why |
|---|---|---|
| One crack or a few metres of leaking joint | Local repair from rope | The work takes hours or days; scaffolding would cost several times the work itself. |
| Fallen render in one spot, an otherwise sound facade | Repair plus repainting of the whole colour field | The repair hides at the edge of the field, so the transition does not land mid-wall. |
| Cracking across the elevation and several hollow areas | Full facade renovation | Repairing twenty spots separately costs more than one continuous pass and the result looks uneven. |
| The facade is sound, only dirty and faded | Cleaning and painting, without remedial work | There is nothing to repair; restoring the protective coating and the look is enough. |
| Water gets into flats and the cause is unknown | Find the cause first, repair second | A coating over an undiagnosed cause lasts until the first wind-driven rain. |
| A facade after fire or prolonged water ingress | Remediation of the affected area, then the finish | Degraded insulation and substrate have to come out; covering up solves nothing. |
Colour matching, or will the patch show?
This is the question we get most often, and the honest answer is that paint mixed exactly to the original shade will not match. Not because it is mixed badly, but because the surrounding facade has faded over years in the sun. The new coating is what the original colour was on the day it was applied.
We handle it in three ways and choose according to the situation. Either we paint the whole continuous colour field out to a natural edge, that is to a corner, a movement joint, a string course or the boundary of the colour scheme, so the transition falls where the eye expects it. Or we adjust the shade to the weathered surface. Or, where there are many repairs, we paint the whole wall.
The other half of it is texture. If the original render has a scraped finish of a given grain size and the repair is finished with a smooth skim, you will see the patch even when the colour matches perfectly, because it catches the light differently. So we rebuild the texture to match both the grain size and the way it was worked.
How we repair an insulated facade, step by step
Repairing an insulated facade is not a matter of filling a crack. It means rebuilding the whole layered system at the point of failure so the reinforcing layer stays continuous, because that layer is what holds the facade together and distributes stress.
- We remove damaged render and base coat back to sound material, and part of the insulation too where it is degraded.
- If the insulation is wet, we let the area dry out. Sealing moisture under a new layer means repeating the whole repair a year later.
- We make good the insulation flush with the surrounding surface and fill the board joints rather than bridging them with adhesive.
- We apply the base coat and bed in glass-fibre mesh overlapping the existing mesh, so a continuous reinforced band is formed rather than an isolated patch.
- At window corners we add diagonal reinforcement, because that is where stress concentrates.
- Once cured, we prime and apply render matching the texture and grain of the original facade.
- Finally we paint, either locally out to the edge of the colour field or across the whole elevation.
Repairing a facade without insulation
With traditional render on masonry the sequence is similar, but the underlying problem is different. The render debonds from the masonry rather than from insulation, and the reason is usually moisture arriving from below or through a leaking detail, or old non-breathable coatings that leave the moisture nowhere to evaporate.
So on an uninsulated facade we address the source of moisture first and the surface second. We hack off hollow and crumbling render, clean and consolidate the area, make good with render of the same thickness and texture, and choose a vapour-permeable coating so the wall can dry outwards.
The plinth and the lowest band of a facade are where damage recurs most often. Splash-back and de-icing salt are there every day in winter, so a tougher build-up is worth using rather than the same material as two floors higher up.
Repairs around windows and sills, the most common source of leaks
The area around a window is where several materials meet and each of them moves differently. That is why the first cracks appear there, and why that is where the leak path into the facade usually is.
- A sill with too little overhang and no drip edge lets water run back underneath onto the facade.
- Missing sill end caps let water run straight into the reveal.
- An unsealed junction between sill and window frame lets water in, which then shows up on the wall inside the flat.
- A missing render stop bead between frame and render, where a crack opens after the very first season.
- Opening corners without diagonal reinforcement, from which diagonal cracks run out into the wall.
These details can be repaired spot by spot without replacing the window. It is usually a few hours of work per window, and since we reach it from a rope, neither scaffolding nor access through the flat is needed.
Movement joints, and what must never be rigidly filled
A movement joint is a deliberate gap that lets the structure work. Fill it with rigid mortar or bridge it with a hard coating and the structure does not stop moving, it simply tears somewhere else, usually somewhere worse.
So a movement joint takes a flexible sealant or a purpose-made profile, not a base coat. The same applies where different materials meet, for example where the facade abuts sheet-metal work or a steel structure. This is the most frequent reason a facade repair keeps cracking in the same place.
Substrate preparation, or why you cannot paint a dirty, damp facade
A coating holds only as well as whatever it sits on. Where a facade carries algae, moss or greasy urban grime, the paint bonds not to the render but to the layer of dirt, and comes away with it. Algae also keep growing under the coating and reappear within a couple of seasons.
So before painting we always wash the facade and, where needed, treat it against algae and moss, which is a separate service covered on our facade cleaning page. The same goes for moisture: you do not paint a damp substrate, because moisture under the paint film lifts it and the coating starts to blister.
Preparation also means removing any old, poorly bonded coating. If the old paint can be scraped off with a fingernail or lifts in a tape test, a new coating has no business going on top of it.
There is a simple check. Stick a piece of tape onto the facade and pull it off. If it comes away with a film of paint or chalky powder, the substrate is not sound and needs more thorough preparation.
Priming, the step most often skipped
A primer evens out the absorbency of the substrate and binds residual dust. Without it, old dry render draws water out of the paint before a continuous film can form, and the coating stays matt, blotchy and chalky.
You can see it in the result. A facade painted without a primer dries unevenly, the shade is lighter where the substrate was more absorbent and the wall looks patchy. A second coat will not rescue it; you have to go back a step.
Silicate, silicone or acrylic paint for a facade
Facade paints differ less in price than in how readily they let water vapour out and how well they resist water from outside. That decision matters more than the shade, because a badly chosen paint does not show up at once but two winters later, when it starts to peel.
| Paint type | How it behaves | Where it fits |
|---|---|---|
| Silicate | Very high vapour permeability, bonds chemically to a mineral substrate, a matt mineral look and a narrower range of shades. | Mineral renders, old lime-cement facades, historic buildings and walls that need to dry out. |
| Silicone | High vapour permeability combined with strong water repellency, picks up less dirt, higher material cost. | Exposed and shaded elevations, facades where algae keep returning, insulation systems using mineral wool. |
| Acrylic | The lowest vapour permeability of the three, good mechanical resistance and colour stability, and a friendly price. | Dry substrates, acrylic renders, plinths and high-wear areas where abrasion resistance matters. |
| Silicate-silicone and hybrid | A compromise: high permeability with better water resistance and easier application than pure silicate. | Ordinary insulated facades, where permeability has to be combined with maintainability and a wider colour range. |
A simplified rule: the damper the substrate and the more the wall needs to dry outwards, the more permeable the paint has to be. A non-breathable acrylic has no place on a mineral-wool insulation system. And what always governs is the technical data sheet of the specific product, not a general rule.
Painting at height and coating a facade from rope
Painting at height means the decorator hangs on a rope and coats the facade in vertical bands from the top down. Technically it is the same work as from scaffolding; the difference is in organisation. You work in narrow passes and have to sequence them so that dried areas never meet fresh ones, otherwise visible joins appear.
So the coating is taken out to natural edges, that is to a corner, a movement joint, the vertical edge of a colour field or a pier between windows. On large uninterrupted elevations several of us work at once, so a pass runs through in one go and wet meets wet.
This is how we worked on Vajnorská for Tulipa s. r. o., for instance. We use the same approach when coating steel elements and plant structures on a facade, where access tends to be even more awkward than on a flat wall.
Weather and temperature, when a facade can be painted
Facade paints carry a temperature window in their data sheet, typically running from roughly five to twenty-five degrees, and it applies to both the air and the substrate. Below the lower limit the film does not cure properly; above the upper one it skins before it can be worked and visible joins appear.
What comes after painting matters just as much. Rain in the first hours washes a fresh coating and leaves marks on the facade that cannot be polished out, only painted over. In the morning the dew point and a damp surface are the issue; in the evening it is the rapid drop in temperature.
In practice that means the season for facade painting runs roughly from spring to autumn, and we plan the date around the forecast rather than the calendar. Substrate repairs, hacking off and joint sealing can be done in a wider window than the final coating.
Facade remediation after fire and after water ingress
After a fire the main problem is not the soot on the surface but what has happened beneath it. Expanded polystyrene insulation melts and shrinks under heat, so even where the render looks unbroken there may be a void behind it. Soot is also acidic and, together with water from firefighting, attacks the substrate.
So in fire remediation we first map the affected area by tapping and opening up test patches, remove the damaged layers entirely, wash the area and let it dry, and only then build up the new layers. Where soot could bleed through into the new coating, we use a barrier intermediate coat.
We proceed similarly after prolonged water ingress, for example from a damaged gutter or a leaking parapet. The difference is that there the cause has to be removed first, or the repair simply repeats itself. We have carried out facade renovation after a fire, and it is work where patience during drying pays off more than anything.
Why from rope rather than from scaffolding
Nobody erects scaffolding around a whole building for five metres of cracking, and that is a sensible decision. Putting scaffolding up and taking it down is a job in its own right, with its own price, a permit for occupying public space, and weeks during which the building is wrapped in a structure someone can climb to reach the windows.
Rope access solves the same thing differently. We anchor on the roof, descend precisely to the damaged spot and work only there. We cordon off the area below the work so nobody passes underneath, and when we finish nothing is left on the facade but the repair itself.
Economically it works up to a certain scale. For a full renovation of an entire apartment block, scaffolding is the right call, because the work runs continuously across the whole elevation and materials need to be to hand. For spot repairs, joint sealing and local coating, rope is clearly cheaper and faster.
Facade painting and the price per square metre, what really drives it
A price per square metre is not a single figure that can be quoted without a survey, because on a facade the painting itself is a smaller share of the work than the preparation. Two facades of identical area can differ several times over depending on the condition of the substrate.
- The condition of the substrate, that is how much has to be hacked off, re-coated and made good before painting.
- The extent of repairs: metres of cracking and joints, and the area of hollow render.
- The type of facade, insulated or not, and which render texture has to be reproduced.
- The material chosen, since silicate, silicone and acrylic paints differ in price.
- Height and access method, whether the work can be done from rope, from a platform or only from scaffolding.
- How articulated the facade is: balconies, loggias, string courses and reveals slow the work far more than a flat wall.
- Roof access and anchoring options, plus any need to cordon off the area below the work.
So when someone asks what a house facade repair costs and what a facade coating comes to, we answer only after photos or a site survey. How our prices are put together and what they include is set out on our pricing page.
Apartment blocks: who approves the repair and how it is paid for
The facade is a common part of the building, so the owners decide on repairs through the managing agent or the owners' association, and it is usually paid from the repair fund. An individual flat owner cannot order a facade repair beside their own flat, even when theirs is the flat the water is getting into.
For a managing agent we can prepare the quote in a form suitable for a meeting or a written vote, with a description of the scope and photographic documentation. Where the defect is an emergency, that is something is falling or water is entering flats, most buildings treat it as urgent work without waiting for a vote, and the agent decides how to proceed.
If you have a damp patch in your flat and your neighbours do not, that does not mean the cause is by your window. Water runs down inside a joint and shows up indoors a floor lower, which is why a survey is never limited to a single spot.
The survey and what we need from you
For a first estimate photos are usually enough. Photograph the damaged spot close up and then the whole building from a distance, so the height, the floor level and the access are visible. If the job is larger or the cause is unclear, we come for a survey and tap out the area on site.
- A close-up of the damage: the crack, the fallen render or the joint.
- A photo of the whole building showing both the height and the surroundings.
- The floor level and the approximate length of the crack or the area involved.
- Whether the facade is insulated and whether it is a panel block.
- Whether and where water is entering indoors, plus a photo of the damp patch in the flat if there is one.
- Roof access and whether anchoring on the roof is possible.
Where in Bratislava we repair facades
We work across Bratislava including Petržalka, Ružinov, Nové Mesto, Staré Mesto, Karlova Ves, Dúbravka, Rača, Vrakuňa and Podunajské Biskupice, and by arrangement also in Senec, Pezinok, Malacky and Stupava. Most of this type of work is on panel blocks in Petržalka and Ružinov and on office buildings in the centre, where we carried out a local facade repair at Hotel Carlton, for example.
How it works
Survey and diagnosis
We tap out the damaged area and establish where the water comes from and how large the debonded area is, so the cause gets repaired rather than the mark it left.
Substrate repair
We remove unsound layers, add reinforcing mesh and base coat, cut out and re-seal the joints, and rebuild the render texture.
Priming, painting and checking
Once dry we prime, paint out to a natural edge of the colour field, and walk the area with you to confirm the shade and texture match.
💡 The price is driven mainly by the condition of the substrate and the extent of repairs before painting, then by height, how articulated the facade is, the paint chosen and the access method. Send photos of the damaged spot and of the whole building and we usually quote within 24 hours.
Frequently asked questions
How much does a house facade repair cost?
It cannot be answered responsibly without photos or a survey, because on a facade most of the price is substrate preparation rather than material. The price is driven by the extent of the damage, the height, the type of facade, how articulated it is and the access method. Send us a photo of the damaged spot and of the whole building and we usually have a quote within 24 hours.
Will the patch show after a local repair?
Done properly it does not, but that is not achieved by mixing the original shade exactly. The surrounding facade has faded over the years, so paint mixed to the original colour would be lighter than its surroundings. We either paint the whole colour field out to a natural edge or adjust the shade to the weathered surface. Rebuilding the same render texture and grain matters just as much.
Can only part of a facade be repaired, or does all of it need renovating?
It can, and where damage is concentrated it is the more sensible option. Full renovation makes sense when defects are scattered across the whole elevation, or when the coating is so weathered that a local repair would look like a patch regardless. We decide by how much of the surface is unsound, not by how much of it is visible.
The crack is thin, can it wait until next year?
We would not advise it. A crack lets water into the layers under the render, and each winter frost prises it a little further open, so an hour's repair turns into hacking off, a new reinforcing layer and a new coating within a few seasons. The cheapest facade repair is always the early one.
Does scaffolding have to go up for the repair?
For local repairs, no: we do them by rope access, descending to the damaged spot from the roof. Scaffolding only makes sense for a full renovation of an entire building, where work runs continuously across the whole elevation. For a spot repair, scaffolding would cost several times the work itself.
When can a facade be painted, does it work in winter?
Usually not in winter. Facade paints carry a temperature window in their data sheet for both air and substrate, typically starting around five degrees, and a fresh coating needs several hours without rain. Preparation, hacking off and joint sealing can be done in a wider window than the final coat, so a job can be split.
Do I need consent from the managing agent or the owners' association?
Yes. The facade is a common part of the building, so the repair is ordered by the managing agent or the association, not by an individual flat owner. For the agent we can prepare a quote with a scope description and photographs for a meeting or a written vote. An emergency is treated in most buildings as urgent work without waiting for a vote.
Water is getting in through a panel joint, can you repair it without scaffolding?
Yes, repointing joints is classic rope work. We cut out the old sealant completely, clean and dry the joint, insert a backer rod and apply a flexible sealant. Sealing over old hardened sealant without cutting it out does not last, because the new sealant bonds to a substrate that is going to come away anyway.
How often does a facade need repainting?
In the order of once every ten years or more, but orientation, exposure and the type of the original coating decide it, not the calendar. South and west elevations fade faster; north and shaded ones grow algae. If the paint chalks onto your hand or hairline cracking is appearing across the surface, it is time.
Related services
Need cleaning or work at height?
Get in touch and we'll prepare a tailored, no-obligation quote, usually within 24 hours.